
Please note, all products are subject to individual installation and maintenance requirements, you should seek professional advice regarding the specifics if in doubt. The guidelines are provided to assist. All floors should be fitted in line with the relevant British Standards and the manufacturer’s installation and maintenance requirements. For more information, please consult us.
Site Conditions
The building must be weather-tight, the heating system operable, and all wet trades (plastering, painting etc.) must have been completed. Hardwood flooring is kiln-dried to moisture content (MC) of 9% to 11% prior to dispatch The MC of the subfloor room temperature and relative humidity (RH) should be checked on site prior to the delivery of the materials. Room conditions at the time of delivery and installation should be as close as possible to the expected in-service conditions – this usually means a room temperature of 18oC to 20oC and an RH of 50% to 65% (60% maximum for planks wider than 175mm). Once these conditions are achieved the delivery of the materials to the site should be as close to the installation date as possible with the allowance of the required acclimatization time. Keep a record of moisture content and room condition measurements that exist at the time of installation including any heat emission from UFH, its go practice and advisory to keep these records of an ongoing nature.
Sub-Floors
Measure the moisture content of the subfloor. Target MC should be 12% to 14% for wooden sub-floors and 3.5% (or 35% to 40% RH using the slab humidity test method as described in BS8201) for cementitious sub-floors. Use a good quality underlay specifically designed for use with engineered wood flooring, please contact your supplier for information on the options available. It is good practice to fit a damp proof membrane (DPM) over cementitious sub-floors; this could be part of the underlay or could take the form of separate heavy-duty polythene (200 microns minimum thickness) or a liquid DPM. Any joints in underlay or polythene DPM must be overlapped by 200mm and be taped with polyethene adhesive tape (some underlays have self-adhesive strips), where possible take the Underlay/DPM up the side walls by 25mm minimum. Use foam underlay (without a DPM) or a breathable building paper on top of wooden sub-floors e.g. bitumen impregnated Kraft paper. Contact your supplier for further advice.
Ensure that the sub-floor is hard, free from dust, and level; according to BS8201, the height deviation must be no more than 3mm measured over a 2m distance using a straight edge. Use a suitable levelling compound if necessary. De-nib the subfloor to remove any sharp irregularities that could cause the new planks to pivot; even a 3mm nib could cause rocking. For wooden sub-floors make sure that all nail or screw heads are flush with the surface; for uneven wooden sub-floors fit 6mm (minimum) wood panels (plywood or similar) to provide a level surface, and ensure joints between panels do not coincide with existing joints in the sub-floor. Voids below wooden sub-floors must be adequately ventilated and where possible a DPM should be fitted at ground level; air bricks should be clear and the ventilation path should be clear of obstructions. Clean the sub-floor and remove any contaminants such as mortar, plaster and mastic droppings.
Expansion
It is essential that an expansion gap of at least 15 mm plus 2 mm per meter of span is left around the perimeter of the room and around any obstructions such as columns, radiator pipes, door casings, hearths etc. and in doorways between rooms. The approximate rate of expansion can be calculated; in larger rooms, above 12m x 8m, it may be necessary to provide additional expansion provisions. Contact your supplier for advice. Expansion gaps can be covered with a variety of solid wood profiles or skirting, it is essential that any covers used do not impede or restrict the natural movement of the boards that will occur throughout the life of the floor e.g. do not force the skirting down on top of the boards, leave 1-2mm gap below the skirting on top of the boards. Do not nail or glue covers to the boards.
Installation
Take the boards out of the packs immediately before installation; draw from at least 30-40% to ensure a good colour/grade mix and to avoid banding. Carefully check each board for defects, liability will not be accepted for defective boards once they have been fitted. Decide in which direction to run the planks; usually the light fall from windows or along the length of the longest wall. Centre the rows of planks so that the perimeter rows are no smaller than 50mm in width. Cut the first row of planks to size and shape to follow the wall whilst maintaining the required expansion gap along the edge and at the ends. Start with the tongue of the first row facing into the room then proceed with the rest of the floor. Try and stagger header joints in adjoining rows by at least 200 mm and keep the length of the end planks in a row greater than 200mm, avoid regular “brick bond” patterns, wood flooring should look random. Engineered wood flooring can be used on water-borne under-floor heating systems and some electrical systems, it is essential that you contact your supplier to see if your heating system is suitable. Please see our separate Installation Instructions for use with Under-floor Heating.
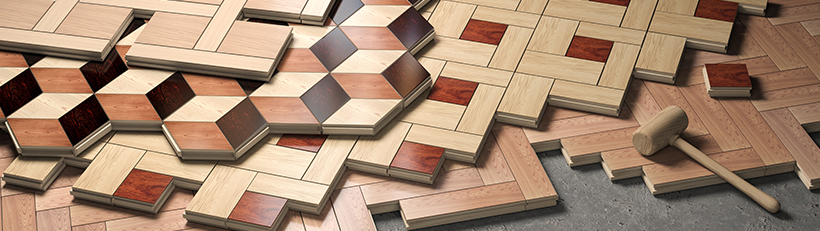
![]() The plank is slightly reclinate by design. During the fitting process for T&G, the fitter should press or kneel down on the centre of the board before slotting them in. This offers the advantage of a tight fit as the “spring” effect of the boards would hold them together tighter once joined.
The plank is slightly reclinate by design. During the fitting process for T&G, the fitter should press or kneel down on the centre of the board before slotting them in. This offers the advantage of a tight fit as the “spring” effect of the boards would hold them together tighter once joined.
Fitting Methods
Engineered wood flooring can be “floated” on an underlay or can be mechanically fixed to the sub-floor by means of nails, screws or adhesive. Solid and all Patterned floors inclusive of Herringbone and Chevron should always be fixed using adhesive or self-adhesive underlay, consult your supplier for the recommended brands.
Floating Installations
Engineered wood flooring can be either a click/lock system that does not require glue on all joints or tongue and groove that does require glue in the header and longitudinal joints. It is important to select the correct underlay for your application, these can range from simple 3mm foam to high-density acoustic underlay with or without an integral DPM, please consult your supplier. Use (an approved) PVA wood glue in tongue and groove versions. Do not walk on the floor until the glue has cured, usually 24 hours. Click/lock floors do not require glue in all areas. A simple rule would be any pieces that are not locked into a neighbouring piece on all 4 sides would require PVA glue. PVA glue for all joints would be recommended for high traffic/commercial applications, in areas where there is a risk of liquid spillage such as kitchens, or above under-floor heating, and can be walked on straight away. In this type of installation, the new wood floor is not fixed to the sub-floor but is held in position by its own weight i.e. it is said to be floating. Determine the centre line of the room, measure the distance from the centre line to the side wall, subtract the width of the expansion gap and divide the result by the width of a plank, this will tell you how many rows will be required to cover half of the floor. If your first and last rows are less than a full plank width, centre the rows so that the first and last rows are of roughly equal width; avoid having a residual plank width of less than 40mm. Layout the first row of flooring end to end with the groove toward the wall but DO NOT glue yet. Remember that not all walls are straight and square. Use a chalk line, level and blocks or wedges to help you get this first row completely straight. Cut planks where needed to ensure the floor is straight even if the walls are not. Remember: Take more time with the first row as it is the foundation for the rest of the floor. Don’t forget to randomise hardwood across this first row to provide a natural-looking floor; draw planks from at least 30-40% to avoid colour or pattern “banding”. Once you are satisfied with the fit of the first row, take apart and stack in the order they will be re-installed (the last board to be installed should be on the bottom of the stack). Re-install the first row, applying a thin bead of adhesive along the bottom of the groove in the header joints. Then continue with subsequent rows, applying a bead of adhesive along the bottom of the groove of the boards to be installed on both the long edges and the header joints. Squeeze hardwood boards together so they fit tightly, and use installation clamps to ensure a tight fit of the first three rows (leave clamped together for one hour before proceeding with the remainder of the floor). Use wedges to maintain the expansion gaps during installation – remember to remove the wedges after completing the installation. Immediately wipe away any adhesive that seeps from the joint with a damp cloth. For click floors simply click the boards together taking care not to force them down – use a tapping block, or off-cut, to gently locate the click system (it is a tapping block NOT a hammer block). You may find it easier to fit the short ends together first and then click the entire row to the next row (this is usually two people’s job). CAUTION: Too much adhesive may interfere with the way the boards fit together, keeping them from fitting tightly together, the last row should be installed using an installation bar or a crowbar.
Stuck – Installations
Use a permanently elastic glue system, there is a wide range of glues available including Solvent Based (single or two-component) or the more user-friendly MS Polymer type. When sticking to cementitious sub-floors use a matched liquid DPM from the same manufacturer of the chosen glue; mixing products from different manufacturers could result in compatibility issues which, in the event of problems, could make it difficult to apportion blame. The glue should be spread out using a notched trowel or bulk gun as recommended by the glue manufacturer’s specification. Only apply as much glue as you can cover within the curing time of the glue, usually about 30 minutes; always follow the glue manufacturer’s instructions. If in doubt contact your supplier for advice.
General
Wood is a natural product, each plank is unique and, depending on grade, may have knots, sapwood and colour variation. Natural defects can be cut out and the resultant cut boards can be used at the end of rows. A professional installer would normally add an additional 5-15% of flooring to allow for wastage for defects and off-cuts. All furniture should be fitted with felt pads to protect the surface of your new floor; if you need to move heavy furniture first place the item on top of soft pile up-turned carpet (make sure it is clean and free from grit) to carefully drag across the floor. Fit entrance mats adjacent to external doors. If you intend to put rugs on your new wood floor please make sure that the backing is nonabrasive, no liability will be accepted for any damage caused in this manner. Wood flooring can be damaged by dropping sharp or heavy objects, by walking on your floor in high heels, or by dragging heavy or sharp objects across it. Clean the floor using nonabrasive, lint-free, damp cloths (never use wet cloth or soak your floor). Ask your supplier for a suitable cleaning agent – this will depend on the type of surface chosen.
Post Installation
For both UV oiled and natural oiled products, the floor is required to be first treated with a coat of hard wax oil prior to use and a refresher coat should apply periodically. Our authorised resellers can establish and provide you with this schedule based on elements such as the volume of footfall.
End users should be advised about suitable aftercare products. Our authorised reseller can provide you with the full range of aftercare products. We recommend the use of our OEM Q-Care range, speak to our authorised reseller for more information.
Under Floor Heating Specifics
Once the flooring has been installed, allow it to sit for 48 hours before turning on the underfloor heating. This will allow it to settle and for any adhesives to dry out. When the heating is switched on, make sure it’s set at just 1°C above the ambient temperature and then raised gradually by no more than 1°C per day until the desired temperature is reached. Note that the floor temperature at the underside of the wood floor shouldn’t exceed 27°C as this could cause excessive drying in the wood. The temperature of the underfloor heating should never be increased or decreased too drastically. It’s actually advised that it is not turned off but instead left to run at lower temperatures, but never below 18°C. If the underfloor heating is completely switched off for a period of time then it should be turned back up gradually using the 1 degree per day guideline as you would after the initial installation. Fixed items including rugs should be used with care as these can trap heat and raise the floor temperature above the recommended level.
For more information about underfloor heating, click here.